How to register WordPress hooks with PHP attributes: A step-by-step guide
{{< toc >}}
In this article, I will discuss how and why WordPress hooks are used in plugins, and how we will use PHP attributes for registering hooks in classes effectively and clearly.
What are hooks and how do they work?
Since I assume a certain level of knowledge about WordPress plugin development for this article series, there is a good chance you are already familiar with hooks. If not, you should learn about hooks now. However, I still want to provide a brief overview as an introduction.
A brief introduction to hooks
Hooks are the most important tool for plugin developers. With hooks, code can be executed at specific predefined points, and data can be modified. Hooks are somewhat similar to events that are fired at certain points in the code, and they are what allow plugins to extend and modify WordPress in the first place!
Please NEVER use methods other than hooks if you want to create a clean and secure plugin! Other methods here refer to modifying core files or any other types of hacks.
There are two types of hooks:
- Filters, which allow you to modify data
- Actions, which allow you to execute code at specific points
Hooks consist of a hook name and a callback function that can be attached to the hook.
The callback functions of filters always have a return statement, while the callbacks of actions usually do not require one.
Filters
Let’s briefly take a look at the function apply_filters() (documentation). This function allows us to execute the callbacks that have been added to a filter name. Any number of callbacks can be added to a filter name.
Suppose you want to allow another plugin to modify your plugin’s data. Let’s say you have developed a book management system as a WordPress plugin, and you have decided that the book management system should only allow science fiction books and horror thrillers. However, you want other developers to be able to create their own plugins that extend your book management system.
In your plugin, you use a method called isGenreValid() to check if the book belongs to the correct genre. This could look like this:
1public function isGenreValid(string $genre): bool2{3 $genres = [4 'Science Fiction',5 'Horror thriller'6 ];7 8 return in_array($genre, $genres);9}
With that, both genres are hard-coded inside the function and can’t be changed from outside. To allow another plugin to modify your genre list, you can work with apply_filters():
1public function isGenreValid(string $genre): bool 2{ 3 $genres = [ 4 'Science Fiction', 5 'Horror thriller' 6 ]; 7 8 $genres = apply_filters('myplugin_book_genres', $genres); 9 10 return in_array($genre, $genres);11}
Now, another plugin (or even your own code, as we’ll see later) can hook into the myplugin_book_genres filter and extend or completely replace the list. If there is no callback for this filter, the original list will be returned, which you specify as the second argument in apply_filters().
The other plugin can then register a callback using add_filter() that modifies the genre array. This could look like this, using an anonymous function, for example:
1add_filter('myplugin_book_genres', function(array $genres) {2 $genres[] = 'Drama';3 4 return $genres;5});
Now, if the genre drama is passed to the isGenreValid() method, it will return true!
Let’s say, in your book management plugin, it’s possible to create virtual bookshelves. Perhaps it’s important for the code hooking into the filter to know which virtual bookshelf is currently selected. The ID of the bookshelf is stored in the class variable $shelfId.
You can add any number of additional arguments to the apply_filters() function to provide more information to the callback that hooks into the hook. This is where we can pass the ID of the bookshelf:
1$genres = apply_filters('myplugin_book_genres', $genres, $this->shelfId);
In the callback function of this hook, we are now able to modify the genre list depending on the shelf ID:
1add_filter('myplugin_book_genres', function(array $genres, int $shelfId) { 2 switch ($shelfId) { 3 case 1: 4 $genres[] = 'Drama'; 5 break; 6 case 2: 7 $genres[] = 'Comedy'; 8 break; 9 }10 11 return $genres;12}, 10, 2);
There are added two additional arguments to add_filter(): 10 and 2. 10 is the priority of the callback in the list of callbacks registered to the hook, and 2 is the number of arguments passed to the callback. The number of passed arguments has to be 2 here, because we need to get $genres and $shelfId.
The priority specifies, in which order the callbacks get called if multiple callbacks are registered for a hook. In case you want your code to run earlier than the other callbacks, you have to choose values lower than the default value of 10. Should the code run later, choose values greater than 10. Callbacks registered with the same priority are called in the order they were registered.
Let’s look at the syntax of add_filter():
1add_filter( string $hook_name, callable $callback, int $priority = 10, int $accepted_args = 1 ): true
As you can see, the default value for $priority is 10, and the default for $accepted_args 1.
Actions
While filters allow data to be modified in specific ways with their callbacks returning the corresponding value, actions interrupt the flow of the code to allow for other additional (external) code to be executed.
The function to run an action is named do_action(). Let’s compare it to its counterpart apply_filters():
1apply_filters( string $hook_name, mixed $value, mixed $args ): mixed
1do_action( string $hook_name, mixed $arg )
As we can see, do_action() lacks the $value argument, which contains the value that gets filtered, and there’s no return value. However, like its filter counterpart, do_action() can also be given required arguments.
The callback, that gets registered via add_action(), runs immediately where do_action() is called.
The function add_action() has the same syntax as add_filter():
1add_action( string $hook_name, callable $callback, int $priority = 10, int $accepted_args = 1 ): true
Let’s assume, you want to load a specific CSS file in frontend. In this case you have to use the action hook wp_enqueue_scripts:
1add_action('wp_enqueue_scripts', function() {2 wp_enqueue_style('myplugin-style', plugins_url('assets/dist/css/my-plugin.css'));3});
This ensures that the wp_enqueue_style() function is called exactly where it is needed for working properly!
Actions are actually filters
Actions are essentially a special case of filters. This becomes clearer, when we take a closer look at the source code of the add_action() function:
1function add_action( $hook_name, $callback, $priority = 10, $accepted_args = 1 ) {2 return add_filter( $hook_name, $callback, $priority, $accepted_args );3}
Behind the scenes, add_action() simply calls add_filter(), passing all arguments – we will use this fact to our advantage below!
But please don’t use add_filter() only
Nevertheless, you should not simply start using only add_filter() from now on – after all, there is a significant difference between actions and filters, and it should always be clear from the code whether a callback is being assigned to an action or a filter.
How do I find out which hooks exist?
As previously mentioned, hooks are essential for WordPress plugin development. The WordPress core has a wealth of hooks to modify almost every aspect of WordPress. Additionally, many plugins leverage hooks, allowing other developers to change the flow and data.
There are basically four different ways to find out which hooks exist. Each method has different advantages and disadvantages and use cases.
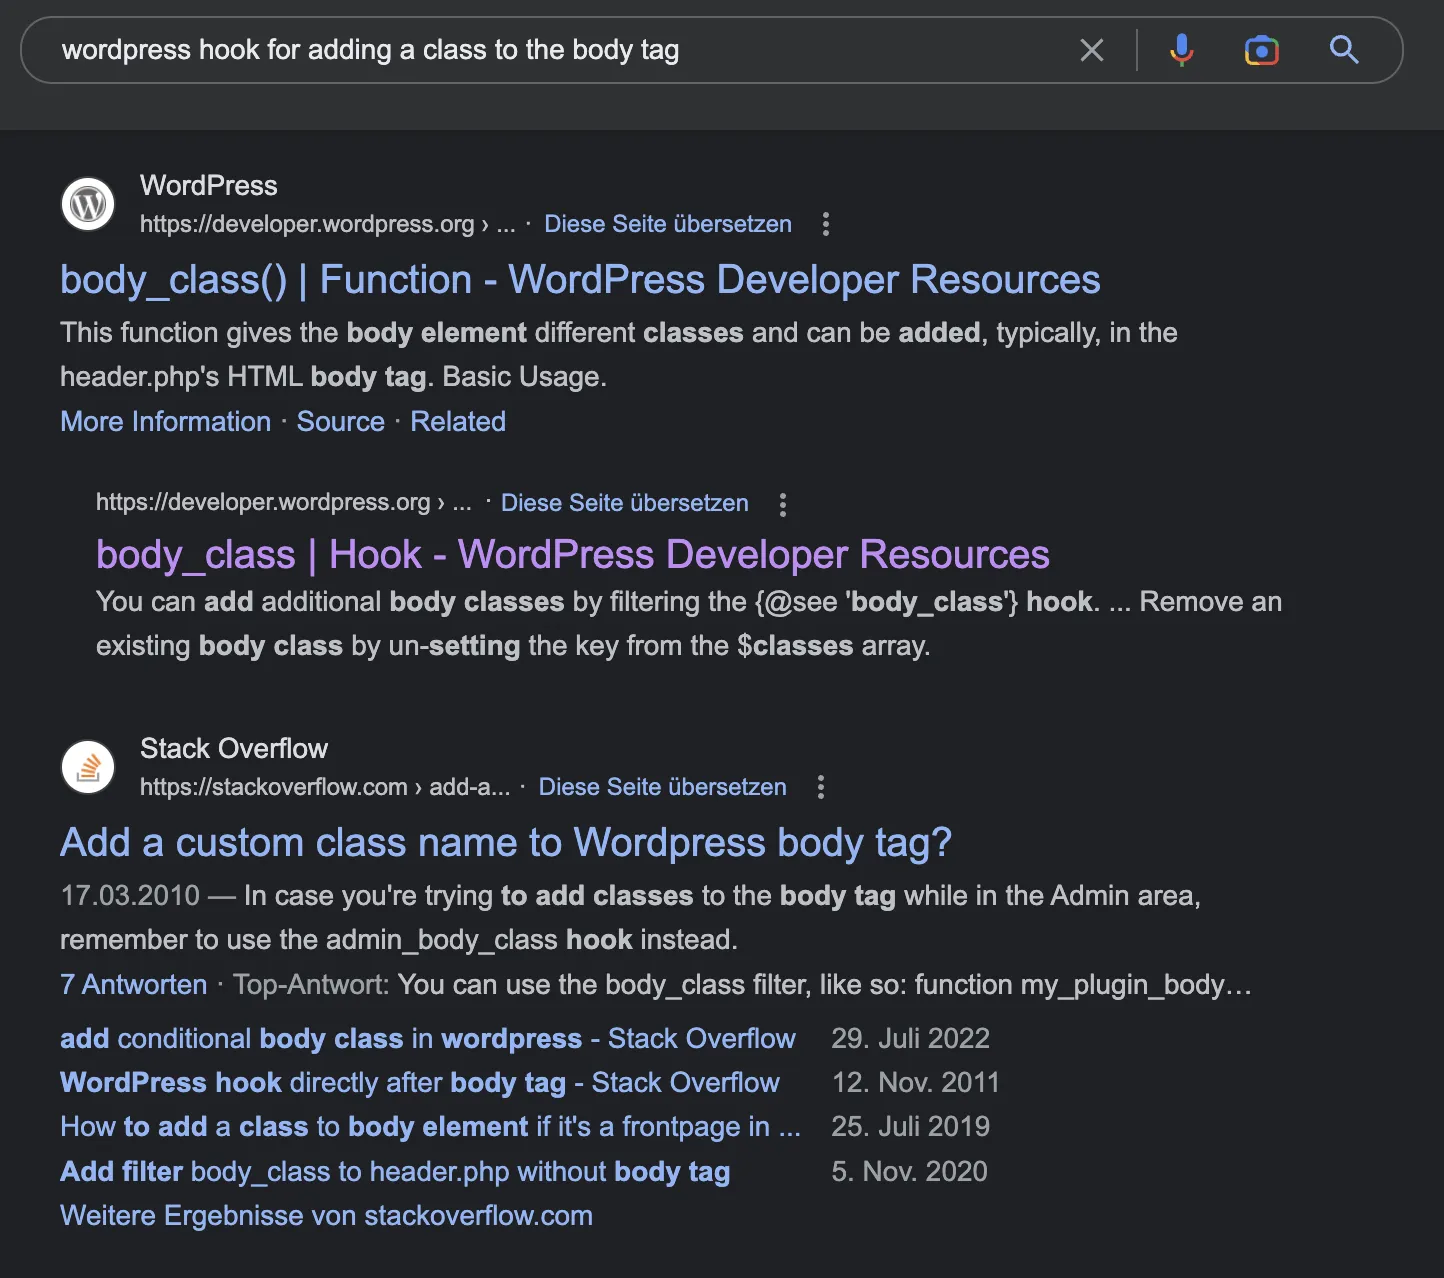
1. Google it:
We can search for hooks on Google. This is useful when we wonder if there is a hook for the problem we want to solve. A Google query could look like this: “wordpress hook for adding a class to the body tag”. In this way, the desired hook can usually be found quickly and easily.
2. ChatGPT
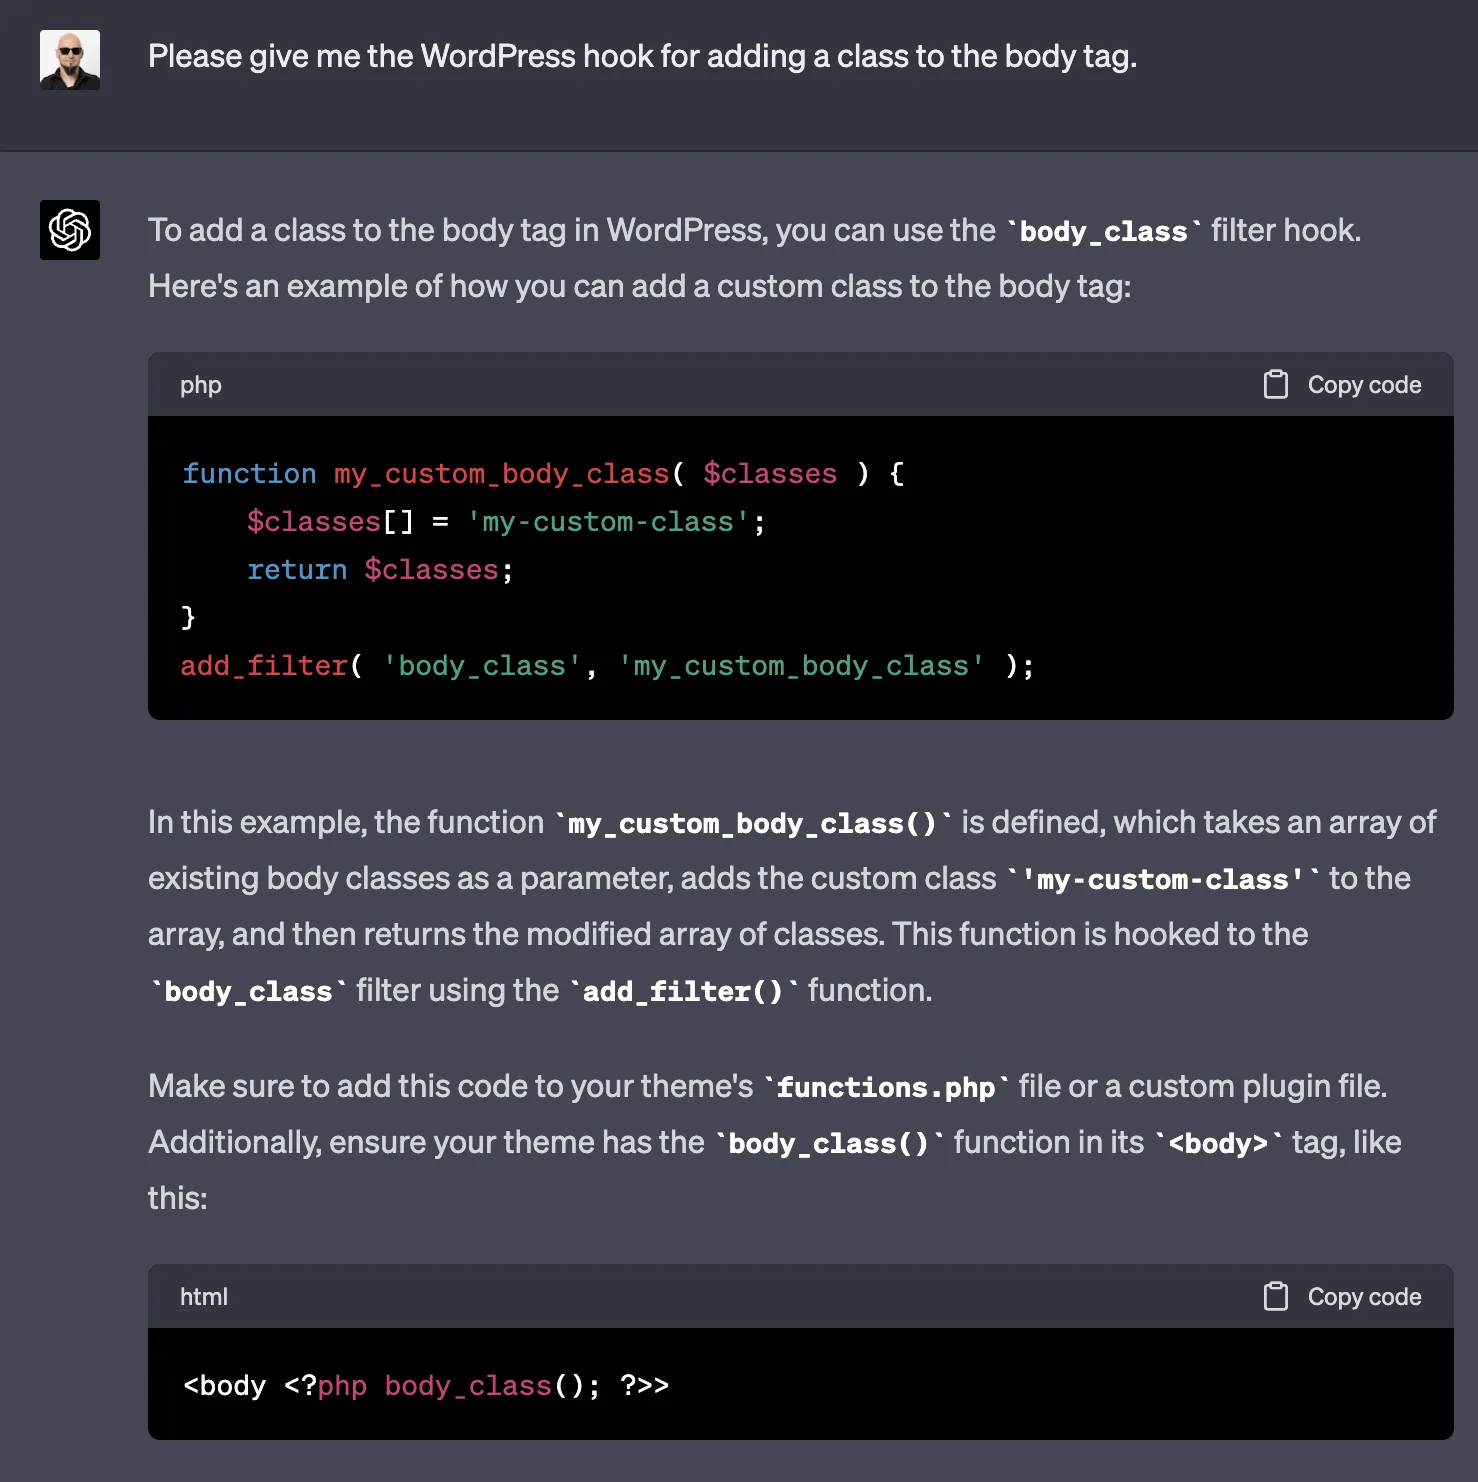
We can ask ChatGPT:
 Version: ChatGPT 4
Here, we notice how extensively ChatGPT responds, not only providing a code example but also pointing out that the theme must support adding a CSS class to the body tag by using the function body_class().
As always, caution is advised with ChatGPT: firstly, the tool’s knowledge base currently ends in September 2021 (so it cannot know any recent changes), and secondly, it is always better to check and test the provided results!
Nevertheless, this type of hook research is superior to a Google search.
3. Documentation and hook directories
- WordPress itself has a list of hooks, and the hooks themselves have their own subpages explaining their usage: Hook Reference
- Plugins that use hooks often provide a corresponding directory as well. For example, WooCommerce
- There used to be a service called hookr.io, a website that listed Core and Plugin hooks. However, I just discovered that this site no longer exists. This is what it used to look like.
Documentations are often easy to search and provide a good overview of the use of specific hooks. However, they are less suitable for searching for the right hook to solve a particular problem.
4. Searching in the source code of WordPress or plugins
The method that brings you the most from a didactic point of view is the direct search in, or reading of, the source code. As a developer, you should spend a significant amount of time reading and studying other people’s code. And, of course, it’s important to know at least the parts of the code that are relevant to you, which you want to change with hooks. So, open the WordPress core (usually, this will be the files in /wp-includes/) in the code editor of your choice (I recommend VS Code) and search for apply_filters and do_action.
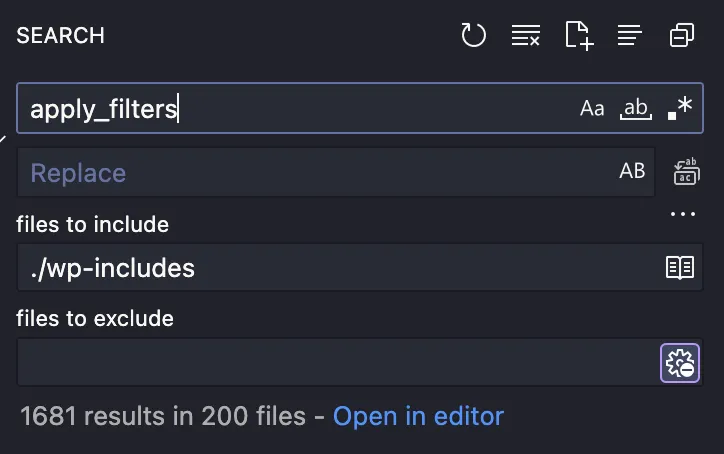 1.681 times
 apply_filters is found
In this way, you are able to find all filter hooks WordPress is using, and you are learning, how WordPress uses hooks internally. Search for add_filter and add_action too and you will see, that WordPress uses its Hook itself. A method we will talk about later.
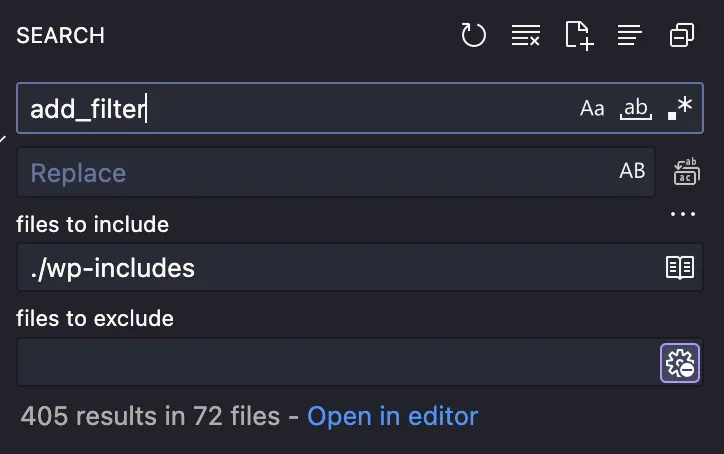 405 times
 add_filter is found
Of course, you should also know the code of a plugin whose hooks you want to use, at least partially, or have it read once. Here you can also search for the used hooks.
Registering hooks inside a class
Now we have found the hook we’ve been looking for and we want to use it in our WordPress plugin. Let’s follow the basic example from above: we have to add a class to the <body> tag using the body_class filter. We assume that this is the first step in the development of a comprehensive plugin, where it will be worthwhile to use advanced programming methods.
We want to define hook registrations inside a class by using class methods for callbacks.There are three classic approaches to this.
Approach 1: Use the class constructor
1class Frontend 2{ 3 public function __construct() 4 { 5 add_filter('body_class', [$this, 'addBodyClass']); 6 } 7 8 public function addBodyClass(array $classes): array 9 {10 $classes[] = 'my-added-class';11 12 return $classes;13 }14}
At an appropriate place, such as in the main file of the plugin or the main class (we’ll learn more about this in a later article), the class is then instantiated in some way. To keep things simple here, as this step is irrelevant for our discussion, let’s imagine that in the main file of the plugin, the instantiation takes place: $frontend = new Frontend();.
When the class is instantiated, the constructor is executed, and thus the add_filter function is called. Our callback in the array notation [$this, 'addBodyClass'] is added to the body_class filter with the default priority of 10 and the default number of arguments of 1.
In a lenient view, this is a valid approach to register a filter callback. However, this approach has some drawbacks, especially in large plugins:
- We are misusing the class constructor to execute the
add_filtercall. Strictly speaking, the constructor of a class should be used to assign the correct values to its parameters at the time of instantiation, in other words, to initialize the object. - When we learn about unit testing later in this series, we will see that calling
add_filter()in the constructor makes testing the class more difficult. We haven’t covered unit testing yet, but I would like to briefly mention here the points that make usingadd_filter()in the constructor challenging for testing:- By calling
add_filter(), the class becomes tightly coupled with WordPress. This makes it harder to test the class in isolation from WordPress, and we would have to work with elaborate mocks just to be able to test it properly. - We violate the rule stating that class constructors should not have side effects but should only be responsible for object initialization. The side effect of adding the callback to the filter makes testing more complicated. Therefore, we need an approach that allows us to avoid calling add_filter() from the constructor.
- By calling
Approach 2: Register from outside the class
In the second approach, we will remove the add_filter() call from the class context and perform the call after the class is instantiated:
1class Frontend 2{ 3 public function addBodyClass(array $classes): array 4 { 5 $classes[] = 'my-added-class'; 6 7 return $classes; 8 } 9}10 11$frontend = new Frontend();12add_filter('body_class', [$frontend, 'addBodyClass']);
This is a significant improvement for the class itself. The class is now better suited for unit testing, and we no longer misuse the class constructor. In our example, the class no longer needs a constructor.
However, there are also drawbacks to this approach.
Drawback 1: Separation of add_filter() call and class/method
When considering the overall structure of our plugin, contemplating its architecture, the question quickly arises as to where the class should be instantiated. Since we want to rely entirely on autoloading (it wouldn’t be ideal to use autoloading for some classes while loading others with require_once()), the instantiation of the class cannot happen in the PHP file of the class itself.
We have the class file src/Main/Frontend.php:
1<?php 2 3namespace MK\MyPlugin\Main; 4 5class Frontend 6{ 7 public function addBodyClass(array $classes): array 8 { 9 $classes[] = 'my-added-class';10 11 return $classes;12 }13}
The call of add_filter() is then done, however, e.g. in the main file my-plugin.php:
1<?php 2/* 3 * Plugin Name: My Plugin 4*/ 5 6use MK\MyPlugin\Main\Frontend; 7 8require __DIR__ . '/vendor/autoload.php'; 9 10$frontend = new Frontend();11add_filter('body_class', [$frontend, 'addBodyClass']);
So, the registration of the addBodyClass() method of the Frontend class using add_filter() is located in a different file from the class itself. This can lead to a state of unmanageable complexity and that makes changes more difficult, especially in large plugins.
For example, if we realize that the number of arguments needs to be adjusted for a filter, we are forced to edit two files: we have to pass the number of arguments to the add_filter() call in the main plugin file and then add the arguments themselves to the method in the class file.
Furthermore, just by looking at the Frontend class in our example, we cannot tell that the addBodyClass() method is a callback for a hook. We would need to indicate this through a suitable PHP comment:
1/**2 * Callback for Filter body_class3 */4public function addBodyClass(array $classes): array
Here, we would need to establish a standard for such comments because if a team is working on the plugin, the hook comments should always have a consistent structure.
Drawback 2: Complexity of registration code
This structure quickly leads to an ever-growing list of registration calls and class instantiations:
1<?php 2/* 3 * Plugin Name: My Plugin 4*/ 5 6use MK\MyPlugin\Main\Frontend; 7use MK\MyPlugin\Admin\Dashboard; 8 9require __DIR__ . '/vendor/autoload.php';10 11$frontend = new Frontend();12$backendDashboard = new Dashboard();13// ...14 15add_filter('body_class', [$frontend, 'addBodyClass']);16add_action('wp_enqueue_scripts', [$frontend, 'enqueueAssets']);17add_action('admin_init', [$backendDashboard, 'registerDashboard']);18// ...
The long lists of class instantiations and hook registrations quickly become unwieldy. More questions arise:
- How should the calls be organized – alphabetically, by class, by hook?
- How do we maintain an overview and create a quick reference in the code to determine which methods belong to which class?
Approach 3: Back to the class
Approach 3 is the version I have used in my plugins for a long time. In this approach, we bring the hook registration back into the class to have the registrations closer to the methods:
1class Frontend 2{ 3 public static function register(): void 4 { 5 $self = new self(); 6 7 add_filter('body_class', [$self, 'addBodyClass']); 8 } 9 10 public function addBodyClass(array $classes): array11 {12 $classes[] = 'my-added-class';13 14 return $classes;15 }16}
The class can then be instantiated with just one call, for example, in the main plugin file:
1<?php 2/* 3 * Plugin Name: My Plugin 4*/ 5 6use MK\MyPlugin\Main\Frontend; 7 8require __DIR__ . '/vendor/autoload.php'; 9 10Frontend::register();
If we have many classes, the list of ::register() calls can become long, and we will need to consider how to organize it differently. However, at least:
- We are not using the constructor for hook registration with
add_filter(). - The hook registration is happening within the class that also contains the callback method.
- This construction is somewhat better for unit testing, as the aforementioned side effect is easier to control through the static method, making the class more suitable for unit testing.
Nevertheless, this method also has its drawbacks:
- If multiple hooks are registered within a class, the static method may contain long lists of
add_filter()andadd_action()calls. - With multiple hooks, the code becomes less organized as the registration calls in the static method are relatively far from their associated methods. Again, we would need to use appropriate comments to indicate which method belongs to which hook.
- For unit testing, this method is more suitable, but it would still be nice if the static method could be eliminated.
Registering hooks using PHP attributes
I occasionally enjoy reading the source code of non-WordPress projects and I’m interested in the structure of large frameworks like Symfony and Laravel.
In Symfony’s routing, I came across the use of PHP attributes for defining routes (see here).
It looks something like this:
1#[Route('/api/posts/{id}', methods: ['GET', 'HEAD'])]2public function show(int $id): Response
I found that very elegant and immediately saw the resemblance to the registration of hooks in WordPress plugins!
What are PHP attributes?
PHP attributes are metadata used to provide additional information about declarations such as classes, methods, properties, or functions. They allow you to write declarative code that influences the behavior of the corresponding elements in a clean and organized way.
How are PHP attributes defined?
PHP attributes serve as metadata for classes, methods, functions, parameters, properties, and constants, and they are declared directly on the line above the element that should be adorned with an attribute.
An attribute begins with the hash sign (#), while the attribute itself is enclosed in square brackets. The simplest declaration looks like this:
1#[AttributName]
Attributes can also have parameters:
1#[AttributName('value')]
We mainly use attributes on methods in this article, so the examples provided focus on that usage.
What is important for us is also the ability to use attributes multiple times since it may be necessary to define two different hooks for a method:
1#[Attribut1('value')]2#[Attribut2('value')]3public function someMethod(): void
Attributes for hook registration
Now, we want to achieve the ability to bind hook declarations directly to the method, so that our class looks like the following example. I have expanded the class with an additional hook to make it more illustrative:
1class Frontend 2{ 3 #[Filter('body_class')] 4 public function addBodyClass(array $classes): array 5 { 6 $classes[] = 'my-added-class'; 7 8 return $classes; 9 }10 11 #[Action('wp_enqueue_scripts')]12 public function enqueueAssets(): void13 {14 wp_enqueue_style('my-plugin', 'style.css');15 }16}
At a glance, we can see the advantages that PHP attributes offer compared to the other methods!
- No more need for a static method.
- By using PHP attributes, the declaration of the hook is in direct proximity to the respective method. This is clear and concise, and we immediately know that the method is a callback for a hook. We can make changes in direct correlation to the method.
- The class is not only easier to cover with unit tests, but we can even establish tests to verify that the correct attributes, i.e., the correct hook registrations, are used.
However, we still have two major issues to address:
- How do PHP and WordPress know what to do with these attributes?
- How and where should classes with hooks be instantiated? Fortunately, these questions are answered by each other, as we will see shortly.
Defining Attributes
First, we need to inform PHP that we want to use two attributes named Filter and Action, which accept the hook name, priority, and number of arguments as parameters.
To do this, we create the folder Attributes inside src/ and create the file Filter.php inside it. With this addition, our sample plugin now has the following structure:
1my-plugin2├── src3│ ├── Attributes4│ │ └── Filter.php5│ └── Main6│ └── Frontend.php7└── my-plugin.php
An attribute in PHP is nothing more than a simple class with its constructor setting the parameters for the attribute. We use constructor property promotion to define the parameters:
File src/Attributes/Filter
1<?php 2 3namespace MK\MyPlugin\Attributes; 4 5class Filter 6{ 7 public function __construct( 8 public string $hookName, 9 public int $priority = 10,10 public int $acceptedArgs = 111 )12 {}13}
To inform PHP that our simple class is an attribute definition, we can use, ironically, an attribute itself. The attribute declares our Filter class as an attribute:
1<?php 2 3namespace MK\MyPlugin\Attributes; 4 5use Attribute; 6 7#[Attribute] 8class Filter 9{10 public function __construct(11 public string $hookName,12 public int $priority = 10,13 public int $acceptedArgs = 114 )15 {}16}
With that, we have successfully defined our Filter attribute. We can further specify that the Filter attribute can only be used on methods and that we can use the attribute multiple times on a single method. We do this by specifying the corresponding flags for the attribute: Attribute::TARGET_METHOD and Attribute::IS_REPEATABLE:
1#[Attribute(Attribute::TARGET_METHOD|Attribute::IS_REPEATABLE)]2class Filter
Here you can find more about attribute declaration in PHP.
So, we have established the Filter attribute, but it doesn’t do anything yet. We now have three steps ahead of us:
- Find a method for instantiating classes with hooks.
- Find a way to recognize that a class uses hooks.
- Actually register the hooks using
add_filter()andadd_action().
Loading, parsing, and instantiating classes with hooks
We will now take care of steps 1 and 2 from the previous section. To do this, we need to tell our plugin where to find the classes that we want to check for hooks.
For the overall architecture, it is important that the classes using hooks should not be instantiated elsewhere. They should only be instantiated through the code we are about to develop. Since classes should generally do only one thing and not have too much responsibility, this should not be a problem.
There are different ways to locate the classes that use hooks. We could search through all classes, but that wouldn’t be very performant.
First, we create a directory in the root folder of our plugin, which we can name config, and create a file inside it, which can be named hooked-classes.php, for example:
1my-plugin2├── config3│ └── hooked-classes.php4├── src5│ ├── Attributes6│ │ └── Filter.php7│ └── Main8│ └── Frontend.php9└── my-plugin.php
In the PHP file, we now list our only class that uses hooks:
1<?php 2 3use MK\MyPlugin\Main\Frontend; 4 5/** 6 * List of classes with hooks 7 */ 8return [ 9 Frontend::class,10];
So, the file simply returns an array with the fully qualified class name of Frontend (::class is a static constant that contains the fully qualified class name, more here).
Next, we want to remove the main code from the plugin file my-plugin.php and establish a plugin main class called App, which we include under Main:
1my-plugin 2├── config 3│ └── hooked-classes.php 4├── src 5│ ├── Attributes 6│ │ └── Filter.php 7│ └── Main 8│ ├─── App.php 9│ └── Frontend.php10└── my-plugin.php
Now, the App class in the _App.php _file is lean:
1<?php 2 3namespace MK\MyPlugin\Main; 4 5class App 6{ 7 public function init(): void 8 { 9 }10}
And the my-plugin.php file is now very clean as well, but we need to define a constant that contains the path of the plugin:
1<?php 2/* 3 * Plugin Name: My Plugin 4 */ 5 6use MK\MyPlugin\Main\App; 7 8define('MYPLUGIN_DIR', plugin_dir_path( __FILE__ )); 9 10require __DIR__ . '/vendor/autoload.php';11 12(new App())->init();
In the main class, we now establish a private method that will handle our classes with hooks, and in the constructor of the class, we load the list of class names:
1<?php 2 3namespace MK\MyPlugin\Main; 4 5class App 6{ 7 public function __construct( 8 private array $classNames = []; 9 )10 {11 $this->classNames = require MYPLUGIN_DIR . 'config/hooked-classes.php';12 13 }14 15 public function init(): void16 {17 $this->registerHooks();18 }19 20 private function registerHooks(): void21 {22 foreach ($this->classNames as $className) {23 // Code for registering hooks24 }25 }26}
In the registerHooks() method, we process the class names in a foreach loop. But what exactly do we do with the class names we obtain in this way? How can we find out if and which hooks are registered here?
We make use of PHP’s Reflection API for this purpose. With this API, we can examine classes at runtime of the script.
In our loop, we first create a reflection class of the original class using new ReflectionClass() (more about ReflectionClass). The reflection class can then provide us with all the methods of the class to be examined using the getMethods() method (more about this method).
1foreach ($this->classNames as $className) {2 $reflectionClass = new ReflectionClass($className);3 4 foreach ($reflectionClass->getMethods() as $method) {5 // Check methods for attributes6 }7}
Now we check if the method has attributes. The getAttributes() method (more info) can return all Filter attributes in an array by passing the class name of our attribute to the method. If filter attributes are defined, we can then iterate over them with another foreach loop:
1foreach ($reflectionClass->getMethods() as $method) {2 $attributes = $method->getAttributes(Filter::class);3 4 foreach ($attributes as $attribute) {5 // Check attributes6 }7}
In this final loop, we finally instantiate our class containing hooks and then need to figure out how to register the callback using add_filter(). To do this, it would be good if we could first instantiate the attribute class Filter. Fortunately, we can do this using the newInstance() method of $attribute:
1foreach ($attributes as $attribute) {2 // Instantiate class with hooks3 $hookedClass = new $className();4 5 // Instantiate filter class6 $filterClass = $attribute->newInstance();7}
Now we have everything we need in one place: we have an instance of the Frontend class, an instance of the attribute class Filter, and the method adorned with a filter attribute. We want to define the registration process within the Filter class itself. To do this, we establish a register() method that passes the callback as an array:
1#[Attribute] 2class Filter 3{ 4 public function __construct( 5 public string $hookName, 6 public int $priority = 10, 7 public int $acceptedArgs = 1 8 ) 9 {}10 11 public function register(callable|array $method): void12 {13 add_filter(14 $this->hookName,15 $method,16 $this->priority,17 $this->acceptedArgs18 );19 }20}
Now that the register method is established, we can call it within the loop in the registerHooks method in the App.php file:
1foreach ($attributes as $attribute) { 2 // Instantiate class with hooks (Frontend in our case) 3 $hookedClass = new $className(); 4 5 // Instantiate filter class 6 $filterClass = $attribute->newInstance(); 7 $filterClass->register( 8 [ 9 $hookedClass,10 $method->getName()11 ]12 );13}
Now we are almost finished with the filter. We just need to ensure that each class with hooks is instantiated only once in registerHooks. Multiple instantiation is not necessary here. To achieve this, we create an instance array and check whether the class has already been instantiated. For clarity, here is the complete method again:
1private function registerHooks(): void 2{ 3 $instances = []; 4 5 foreach ($this->classNames as $className) { 6 $reflectionClass = new ReflectionClass($className); 7 8 foreach ($reflectionClass->getMethods() as $method) { 9 $attributes = $method->getAttributes(Filter::class);10 11 foreach ($attributes as $attribute) {12 // Instantiate class if not instantiated13 if (! array_key_exists($className, $instances)) {14 $instances[$className] = new $className();15 }16 17 // Instantiate filter class18 $filterClass = $attribute->newInstance();19 $filterClass->register(20 [21 $instances[$className],22 $method->getName()23 ]24 );25 }26 }27 }28}
Indeed, we have now completed the registration of filters! We would now need to do the same for actions. But of course, this can be done more easily.
Let’s take another look at this line:
1$attributes = $method->getAttributes(Filter::class);
And now let’s check what we can do with getAttributes():
1public ReflectionFunctionAbstract::getAttributes(?string $name = null, int $flags = 0): array
Interesting, so we can provide flags! A look at the documentation shows that we can set the flag ReflectionAttribute::IS_INSTANCEOF, which means that filtering is no longer done by the exact name of the attribute class, but instead instanceof is used for filtering.
This naturally leads us to the idea of using an interface for the attributes. We create two new files in our Attributes folder: Action.php and HookInterface.php:
1my-plugin 2├── config 3│ └── hooked-classes.php 4├── src 5│ ├── Attributes 6│ │ ├── Action.php 7│ │ ├── Filter.php 8│ │ └── HookInterface.php 9│ └── Main10│ ├── App.php11│ └── Frontend.php12└── my-plugin.php
In the HookInterface.php file, we establish our interface that requires our hook attributes to implement a register() method:
1<?php2 3namespace MK\MyPlugin\Attributes;4 5interface HookInterface6{7 public function register(callable|array $method): void;8}
In the Filter.php file, we now need to declare the Filter class as an implementation of HookInterface:
1#[Attribute(Attribute::TARGET_METHOD|Attribute::IS_REPEATABLE)]2class Filter implements HookInterface
With that, we are indeed completely done with the filter.
Creating the Action Attribute
Creating the Action attribute class is now the easiest task. As we saw earlier, add_action() internally just calls add_filter(), which is why we can work with inheritance here. We open the Action.php file and create the following code:
1<?php 2 3namespace MK\MyPlugin\Attributes; 4 5use Attribute; 6 7#[Attribute(Attribute::TARGET_METHOD|Attribute::IS_REPEATABLE)] 8class Action extends Filter 9{10}
So, we only create a new class that completely extends the Filter class. All properties from Filter are inherited in Action.
As the last step, we now need to adjust the getAttributes() method in the App::registerHooks() method:
1$attributes = $method->getAttributes(HookInterface::class, ReflectionAttribute::IS_INSTANCEOF);
Thus, getAttributes() returns all attributes that implement the HookInterface, which in our case are the attribute classes Filter and Action.
Conclusion and Outlook
In this article, you have learned what hooks in WordPress are and how to register callbacks for hooks. We have seen the methods for registering hooks in classes and how to use autoloading, namespaces, and PHP attributes to implement hook registration in a simple, clear, and unit-test-compatible way.
The solution we have developed is complex but can now be used in any of your plugins that require it. All you have to do is drag the Attributes folder into your new plugin and adjust the namespaces.
In my opinion, we have created a good foundation that defines hooks exactly where the callback is located and ensures that everything is loaded almost magically through autoloading without endless require and instantiation lists. In a later step, we should optimize the registerHooks() method, or create a separate class for it. This will be covered in one of the upcoming articles.
In the next article, we will focus on structuring your plugin in such a way that you can rely solely on hooks. This will make your plugins virtually infinitely extensible and even more maintainable. A nice side effect is that you open your plugin for modifications and adjustments by other plugins.
In a further article, we will return to the techniques described here and learn why dependency injection is a must in this architecture.
Plugin code
You can find the entire plugin code here on GitHub.
Note: Usually, you would add the vendor directory to the .gitignore file, as it has no place in the repository. For the sake of clarity, however, I made an exception here so you can see which code is generated by Composer.